Canning from kegs isn’t quite as straightforward as canning from a brite/unitank, but it can be done. With a little insight and ingenuity, it can be relatively easy. Use these helpful tips for best results.
Cold kegs are better. Warmer beer is foamier beer and ideal canning temperatures are 32-34°F. Kegs are usually stored at 38-40°F, which means it may be hard to control the foam during canning. If you’re only going to can from kegs on rare occasions and only a few kegs, it may be easy for you to place the kegs in an ice water bath overnight to cool them down. If that’s difficult, don’t worry, we have more tips.
Warmer beer needs higher pressures. In order to keep the carbonation in the beer so it doesn’t start to breakout in the lines on the way to canning machine fill heads, the keg pressure will need to be higher than when canning colder beer. The increased pressure will prevent breakout which is nothing more than the start of the foam you may be trying to fight. However, that increased pressure means higher fluid velocity and at some point that will cause turbulence in the fill heads, which would then cause foam from the turbulence. Seems like you may be stuck! You have warmer beer at a higher pressure to keep the breakout from occurring, but the dispense speed of the beer is too high. Now what?
Longer beer lines slow down the beer. OK, if you’re stuck canning beer at warmer temperatures it is quite likely that you’ll need to increase the length of the small diameter beverage tubing lines that go from the beer manifold to the fill heads. The longer lines will then slow the beer back down again and despite your increased keg pressure, you can dispense the beer at a normal speed again. If you go back to canning at normal temperatures and pressures, you may want to go back to shorter beverage tubing to regain the fill speeds you had before.
Other Tips
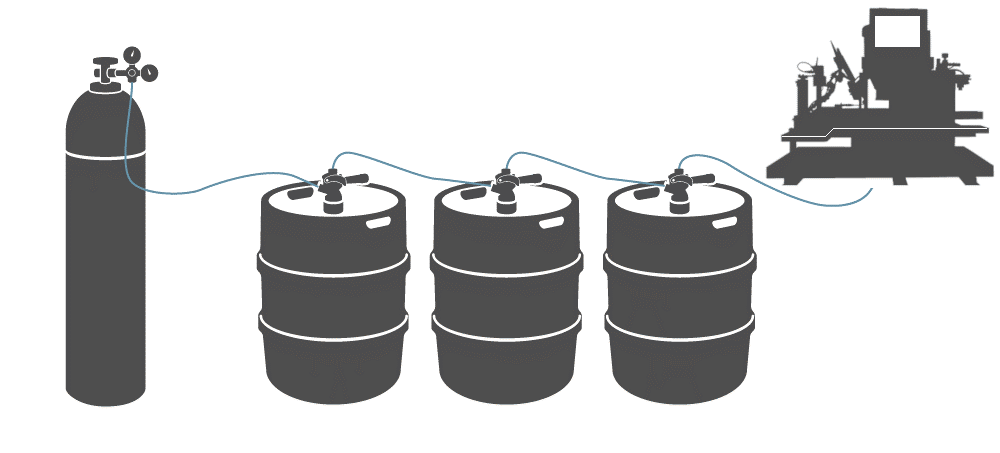
Daisy-chain multiple kegs. Every time a keg is emptied, beer is wasted. At the end of the keg you blow the keg and the cans getting filled are partially filled and probably foamy. Then when the next keg is started the first cans may be foamy if the lines have warmed up. This waste can be minimized if you’re canning several kegs simply by taking the outfeed liquid from one keg and sending it into the infeed gas port of the next and so on. The first keg in the chain is fed normally by CO2; the last one hooks up normally to the canning line. That means the keg closest to the canner always is being topped off with new beer until all previous kegs empty and you only blow the kegs when they are all empty, minimizing losses.
NOTE: keg couplers have check valves in the gas port meant to prevent beer from going out that port. They will also cause unnecessary restrictions when forcing the beer in and they should be removed. They are a little rubber piece with a flap and easy to remove or reinstall.
Here is a picture illustrating the concept for going to our Mancos canning line.
Daisy-chaining may help even with one keg. Even if you only have one keg to can, if there are sufficient restrictions to the CO2 flow, it may cause some unevenness in the beer filling speeds because of fluctuating pressure. It may help to hook up an empty keg (filled with CO2) as the first keg just to provide a kind of surge tank that feeds the full keg you are canning from.

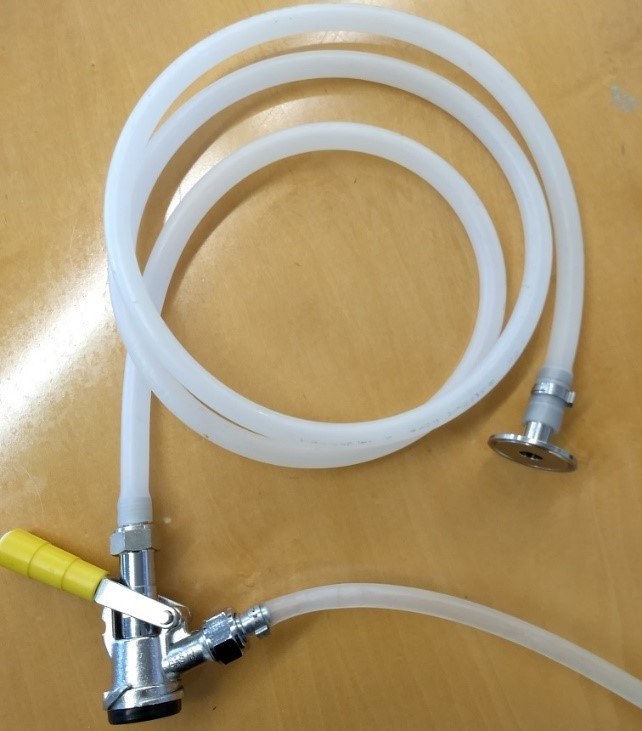
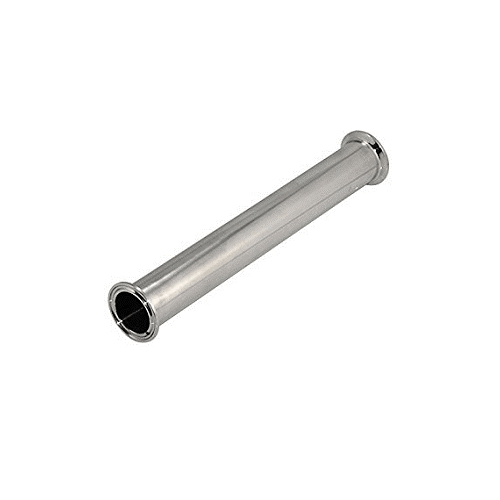
Make sure the keg beer hookups aren’t too restrictive. Use large diameter tubing that is relatively short for the keg hookup to the canner manifold to prevent new restrictions (unless there is a need to slow down high pressure beer (see earlier sections on that topic). Make sure the hookup from the keg setup to the beer manifold doesn’t have any potential blockages. Some Twin Monkeys manifolds will need a stainless 1 ½” pipe spool or similar just to allow a small opening from the keg setup some distance from the small openings off-center to it in the canner manifold.


